Replacing a failed disk (Lenovo ix4-300d)
| Version | Date | Notes | By |
|---|---|---|---|
| 0.1 | 2017-08-07 | Initial release | jfm |
The replacement drive should be the same size of bigger.
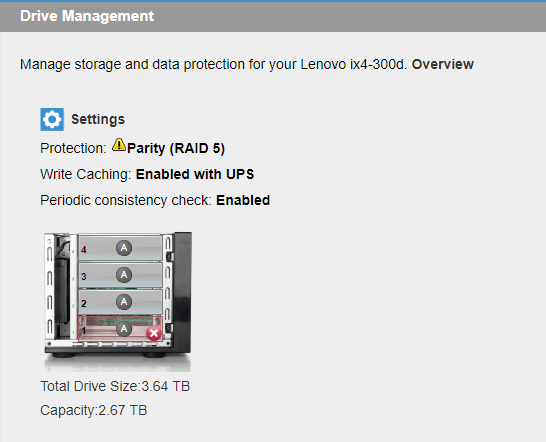
- First be sure that the drive is failling and wich drive is failling. On the NAS web interface, go the the Drive Management option and check the image to identify the failling disk
-
Next poweroff the NAS
-
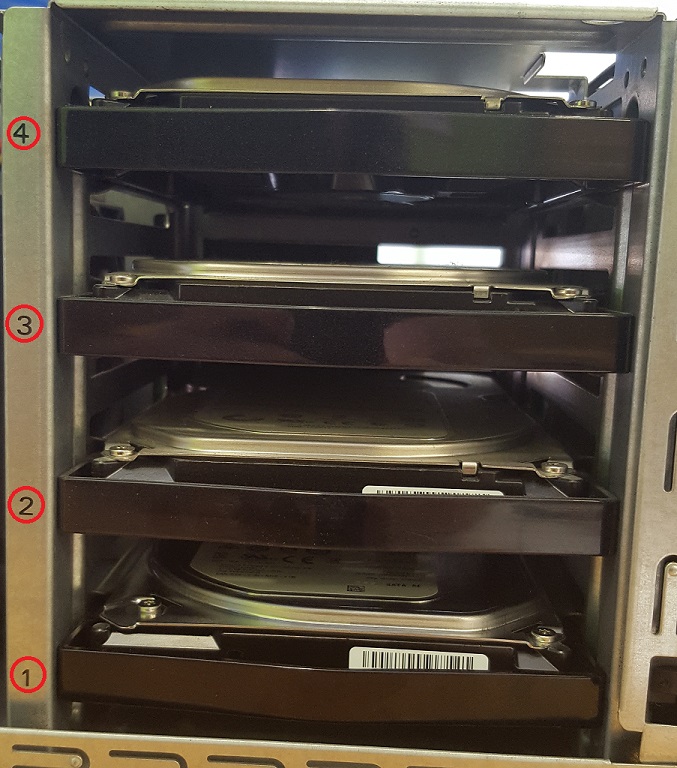
Open the case and identify the disk by the numbers
-
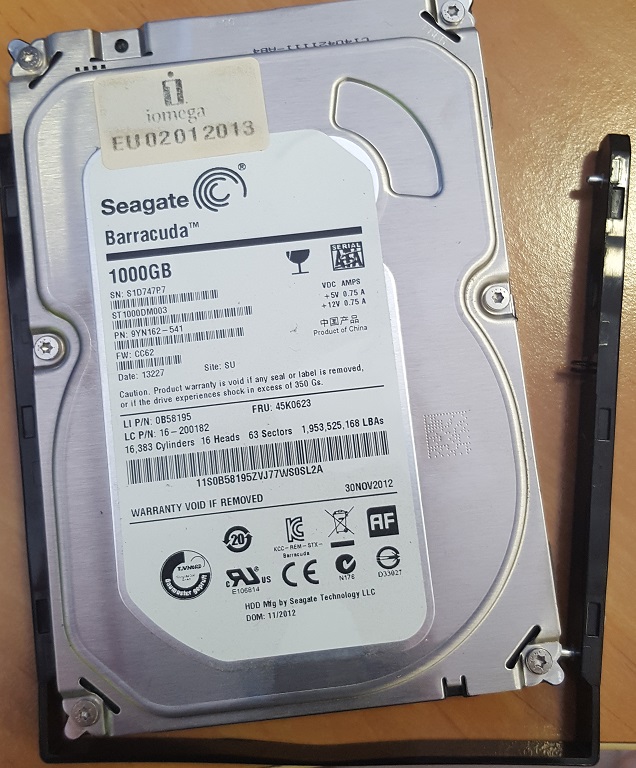
Pull the failed drive (may need to pull hard, it doesn't come off easily)
-
Remove the frame arround the disk
-
Put the frame arround the new disk and push it to the drive bay (you may have to push hard until you feel that the drive is attached)
-
Close the case and power on the NAS
-
The recovering process should start automatically
You can follow the progress if the recovering by checking the mdstat file: cat /proc/mdstat and checking the status of each raid volume mdadm --detail /dev/mdx
cat /proc/mdstat

Personalities : [linear] [raid0] [raid1] [raid10] [raid6] [raid5] [raid4]
md1 : active raid5 sda2[4] sdb2[1] sdd2[3] sdc2[2]
      2867265024 blocks super 1.1 level 5, 512k chunk, algorithm 2 [4/4] [UUUU]

md0 : active raid1 sda1[4] sdb1[1] sdd1[3] sdc1[2]
      20970424 blocks super 1.2 [4/4] [UUUU]

unused devices: <none>
mdadm --detail /dev/md0
/dev/md0:
Version : 1.2
Creation Time : Mon Dec 10 21:42:51 2012
Raid Level : raid1
Array Size : 20970424 (20.00 GiB 21.47 GB)
Used Dev Size : 20970424 (20.00 GiB 21.47 GB)
Raid Devices : 4
Total Devices : 4
Persistence : Superblock is persistent
Update Time : Mon Aug 7 16:19:50 2017
State : clean
Active Devices : 4
Working Devices : 4
Failed Devices : 0
Spare Devices : 0
Name : eth0:0
UUID : 76bb1d6a:d1cf53f3:b8ef5467:badfd492
Events : 6355760
Number Major Minor RaidDevice State
4 8 1 0 active sync /dev/sda1
1 8 17 1 active sync /dev/sdb1
2 8 33 2 active sync /dev/sdc1
3 8 49 3 active sync /dev/sdd1
Found errors? Think you can improve this documentation? Simply click the Edit link at the top of the page, and then the icon on Github to make your changes.